Thursday 27 March 2008

A view of things to come

Well the block is finally painted with its couple of initial coats of paint.

I need to check the amount of 'free' crankshaft at the non-flywheel end of the engine. This will either be used to drive alternators etc or be coupled to a gearbox (the jury is still out on this one).

The only way to be sure was to assemble the timing cases on the end of the engine and break out the ruler. It was a nice day to day so I wheeled the engine out in to the freash air and:

A view of things to come?

It was then a case of bolt on the timing case and then the governer/oil pump casing.


The result? 4 inches. It doesn't sound much, but as the Actress said to the Bishop, "4 inches can make all the difference!"

Mmmm...... what to do?

Wednesday 26 March 2008

Loads of Pistons!

It’s been over 10 days since the last entry. Sorry.

It's not that I haven’t been doing anything either. I’ve been doing bits here and there, plus a bit of socialising. I can’t spend all my time in the garage being "Billy –no mates".

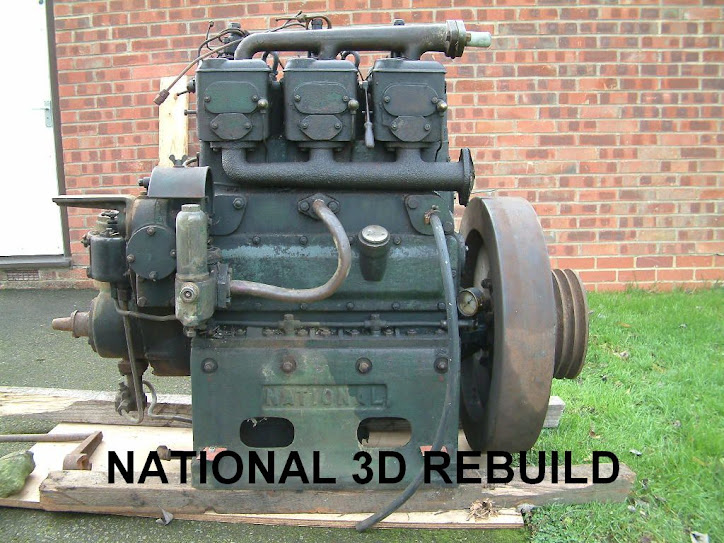
The main thing of note is ‘pistons and liners’.

I want to try to keep the engine as original as possible (I may have mentioned this before - yawn). Anyway – to cut a long story short, Jim and Sarah of NB Warrior fame very kindly offered me Warrior’s old pistons and liners if theirs were better than mine (they had all of theirs replaced with new shiny alloy ones when RN re-built their engine).

Plans were made and we decided to attend a CWF Banter at Napton (last Monday). Pistons would be compared and exchanged there. As it happen, I went to the boat gathering at Stoke Bruerne on the Sunday, so did Jim & Sarah, and the exchange took place in the Museum car park.

In the end I’ve kept all of the pistons and liners so that I can measure them and decide what are best. On the face of it, Warriors liners appear to be hardly worn at all and I think they could easily be recycled after a slight hone. The pistons also look better and again. I think these can be re-used.


A few other bits finished off now are the rocker covers and the cylinder head air intakes.


They where a real pain to clean up and paint, but they look nice now.

Hopefully I’ll hear back from PRM soon about the gearbox and coupling arrangements, I can then get the crank etc sent off for machining. It’s sat in the garage at the moment ready to go.


Still... plenty of other things to do in the mean time. I really do want to attack the cylinder heads soon!

Sunday 16 March 2008

Inspiration

Half past three on a Friday afternoon and the mobile goes beep.
Its Keith and Jo on ‘NB Hadar’. "We’re at Thrupp, just up from the Jolly Boatman. We’ll be around for a couple of days if you want to meet."

Well, all of the household were out that night, so there was no time like the present. A few text’s later and we arranged to meet that night on the boat and then retire to the pub. It seemed like a good plan.

It ended up as a very pleasant evening in the company of Keith and Jo, plus fellow bloggers; Bones http://mortimerbones.blogspot.com/ and Maffi http://www.narrowboater.blogspot.com/.

Being as it was dark and all that, I returned the following morning to talk engines and stuff with Keith.
Keith and Jo are justifiably proud of Hadar. Built by Roger Fuller, she’s as good a replica (little) Northwich as you’ll ever see. At her heart beats a National DA 2.

The National DA is very different to the D engine, but is every bit as nice. Keith went through the normal priming procedures and, with a couple of seconds prod on the starter button, she fired up and settled down to a deep sounding rhythm. Very nice. Keith and Jo have had their own problems with their DA and these are well documented on their blog. That said, I don’t think they’d want anything else in the engine room.

The tittle of the post – ‘Inspiration’. A couple of hours with fellow Narrowboaters and vintage engine enthusiasts does help now and then. The sound of their DA makes you want to come back and get on with your own project.

Onwards and upwards!

Saturday 8 March 2008

Engine Number(s)

Sarah (nb Warrior blog) recently posted about some recently acquired injectors http://nbwarrior.blogspot.com/2008/03/if-youre-going-to-mug-me.html

Amongs't the ramblings of an excited woman ;-) she bought up the subject of the number(s) stamped on them (check out the comments).

Well, my injectors are all stamped with:
5mm
NATIONAL
56214
No1

6mm
NATIONAL
56214
No2

4mm
NATIONAL
53514
No4

56214 is my engine number, so:

Two of the original injectors for No's 1 & 2 cylinders and a replacement for No 3 (of off engine number 53514?). So where is engine number 53514 (was it a 4 cylinder?), and who's got my injector for No 3 cylinder?


So, there I am - out in the garage doing guess what? - cleaning, wire brushing, painting!

This time its the rocker covers. And guess what - on the flat machine end of the cover is stamped 56214 -1. Before you can say "boo to a goose", the remaining 5 have the machined ends cleaned up. Each are stamped 56214 - 1, 56214 - 2 & 56214 - 3. Three for the inlet and three for the exhaust.

I don't think you can see it very well in the photos, but its on the 'flat bits' at the front of each one.
Why did National take the time to stamp up individual components with the engine number and sub numbers for each of the cylinders? Surely a rocker cover is a rocker cover? It wouldn't be individually machined and made to measure for each cylinder etc - or would it?.

The only other place I know that the engine number is stamped is on the block at the flywheel end

So - where else is it going to turn up?
Edited to add - Jim, put your spanners down. Don't let Sarah make you take it apart, "just to see". ;-)

Sunday 2 March 2008

Pistons n things

I think in an earlier entry I said that the strip down was complete. I have to say, I lied. There are a couple of 'sub-components' (not sure if I like that word - sounds a bit to american'ised to me) that still need to be attended to. One of those is the pistons (the other is the governor assembly).

I remember many years ago an old engineer (before I became an old('ish) engineer) telling me, "a piston will tell you what an engine has been doing and how its been looked after".

So, I present my piston(s) - well one of them (but the other two look very similar).

The piston assembly consists of a separate housing for the big end bearing. This in turn is bolted to the bottom of the connecting rod with the piston at the top.

From the next photo, you can see that the rings are badly gummed up and tight in the grooves. The residue is quite sticky. The problem with this is that the rings are not/have not been doing their job properly. They should be free to allow them to expand out and make proper contact with the wall of the liner. Judging by the state of the pistons, I expect that the engine had been difficult to start and would have been quite smokey. The lower and upper oil rings wouldn’t have been doing their job and I sure some lub oil would have been finding its way in to the combustion chamber and some of the products of combustion finding their way in to the crankcase.

Although its not very clear, the bottom of the piston crowns are also very carbonised and sludgy. This would indicate that the pistons were not getting very hot ‘in use’.

So what would the ‘old engineer’ make of this. A typical cause of this type of problem is lack of use, only being used for short periods of time or the engine never reaching its working temperature/lightly loaded.
A scenario that meets this? A standby generator? Spends a lot of its time idle. When it is run, it’s only for relatively short periods of time (‘on test’). Light load – standby generators are rarely loaded when being test run (bad practice). All of which lead to the engine never reaching its proper operating temperature.
So, is that what the engine was used for? It ties in well with the four groove ‘V’ belt pulley that was bolted to the original flywheel. The engine was hand start only, so if it was a ‘standby power generator’, it wasn’t for critical plant. I’ll probably never know for sure, but it’s a bit of engineering forensics!

Next will be to de-gum the rings and clean up all of the grooves. I would really like to be able to reuse them as the alternative would be RN's alloy units and that has a whole load of other knock on requirements.