Sunday, 17 February 2008

A start on the block

I sometimes sit and think - I must write something on the blog. But what to write? Even when I've 'pottered' in the garage, its not alway easy to see a tangible result.

Not so true this week as I've a little to report and some tangible results. The title sort of gives it away, I've made a start on the inside of the block (well, finished it really).

Below are a string of photographs going through the process from start to finish. When you look at the final result (a bit of half painted casting), its difficult to see why it took you 10's of man hours to do (but it did).

The first picture (previously published) shows the underside of the block after it was steam cleaned but with the liners still in place, along with the cam followers and liner bottom collars.

The next one is the same view (but 180 degrees round). All of the components have been removed and the casting degreased.

The next stage after de-greasing - attacking it with the wire brush(es). Most of this is done using a variety of rotary brushes to get in to all of those important little places.

Isn't it shiny!

The final stage - painting! Now it's a case of making sure that all of those nooks and cranies get painted. The other side is making sure that you don't fill/get paint in to some of the holes (the cam follower and cylinder head oil drain holes in this case)


The final result is a painted (internally) block.

What next? A fair guess would be more: cleaning, wire brushing, painting!

Saturday, 9 February 2008

Bottom end ready?

A little more progress to report (work does get in the way!)

The bottom end is now ready for delivery to the machine shop!

All of the internals have been painted with Glyptal enamal. Aparantly it seals castings and aids with the smooth flow of oil. From my point of view, it will make long term maintenance easier with regard to oil changes as the sludge will be easier to wipe out. This will be aided by the newly finished sump:


While I'm posting a few picci's, here's a close up of the front crank journal and big end bearing:


You can see why it needs a re-grind and new white metal bearings.

A bit of news on the gearbox front as well. Just when you think you've got it sorted in your mind, a fellow rebuilder contacts me and say's that he's heard a rumour that PRM are currently developing a 260 gearbox with a 1:1 ratio.

Not backward in coming forward, I contact PRM who do indeed confirm this to be the case. Currently, they do not know time scales. It is in its final stages of development but will require extensive testing before being released to the market place.

This would be an ideal solution for me. It can handle the torque and would mean a 21" prop with 1.5" shaft and stern gear. I wonder if they want to give me one to test?

Sunday, 3 February 2008

"The Black Beast"

Sorry I've been away for a while. Had a fight with the old flu virus. Unfortunately it won. I knew I must have been ill because I couldn't even drag myself in to the garage. Still, back in the land of the living now.
As per all rebuilds, there is always that boring stage of cleaning, stripping (paint, that is) wire brushing, cleaning, stripping, wire brushing, that seems to go on forever. I think I may have mentioned this before! Well........ its still going on.

However, hears a little taster of what it may look like in the future:

The observant amongst you may have noticed that its black! Not the traditional colour I hear people say (if indeed there is such a thing) and I am half expecting to be strung up for such heresy, but I think it will look the biz when finished. The daughter has already nick-named it "The Black Beast".

I've just got the internals of the crankcase to finish off (cleaning, stripping, wire brushing - you know the form!) and then the whole bottom end, crank and conrods is to be shipped off for a re-grind and new bearings.

A couple of other bits 'finished' are the water pump casing and the Auto-Klean disc strainer (a posh and very effective oil filter).


Hopefully you can see the contrast between the black and the brass/bronze fittings. I have an image in my mind of the black castings set off by all of the brass/bronze and copper fittings. Hopefully it should all come together.

Wednesday, 23 January 2008

Props, gearboxes and final drive ratios

I'm nearly there as far as a decision about gearboxes etc.

Crowthers got back to me:
Have now carried out calculations for you and have the following recommendation:-
Based on a direct drive gearbox 1:1 the propeller would be 21" diameter.
1:5:1 the correct propeller would be 28" diameter but we note you would be unable to swing this and therefore put forward one of our compensated range of propellers which would be 24" but with a larger blade area ratio to give the equivalent of the 28" required.
Obviously it would not be possible for you to have 2:1 reduction as even with our compensated range you would not be able to accommodate a big enough diameter.


That leaves me with two options for a prm gearbox:
A prm 500 or prm 750 with 1.5:1 reduction throwing a 24" compensated prop
A prm 750 with a 1:1 reduction throwing a 21" standard prop

Both gearboxes are an expensive choice! About par for the course

I now hunt for a gearbox. There's not much call for the bigger prm units on the inland waterways. I'll have trawl the marine breakers on the coast.

The positive side is that the mounting dimensions for both the 500 & the 750 are identical, which means that I can make a mounting plate up ready for the gearbox to connect to the engine.

If any of you have a 500 or 750 at the back of the garage - let me know!

Monday, 21 January 2008

A Three Pot National

For those of you who have missed Sarah's comment on the last post - Here is Warriors National 3DM in glorious sound and vision.

http://nbwarrior.blogspot.com/2007/09/sound-and-vision.html

Are there any more three pot units out there?

Sunday, 20 January 2008

Nationals in Action

Progress on the engine is currently consisting of cleaning, wire brushing, cleaning, wire brushing and more cleaning. A slow and laborious task that has to be done before any real painting and restoration work can take place. Not very exciting and certainly not good blog reading. Still, it has to be done.

During those times that I've not been cleaning, wire........etc etc, various searches for info and connections for National engines have thrown up a few video clips. If you've got a few minutes spare have a look (and listen):
The first three are of the Stewarts & Lloyds Tug No3 'Vesta' (2DM)
http://i173.photobucket.com/albums/w67/gusickle/?action=view&current=MOV01370.flv
http://www.youtube.com/watch?v=nHzKAC5uxTU
http://www.youtube.com/watch?v=Shli2k_HFC8
The next two are MB Swallow and her 2DM
http://www.youtube.com/watch?v=TBG48nnGqUk
http://www.youtube.com/watch?v=xweaeC1PKAo
and finishing off with the small woolwich Alcor with her 2DM
http://www.youtube.com/watch?v=7tOjTY5n5wU

I don't think I'm contravening any copyright by publishing the links as they're all out in the public domain. If anyone has any objections or would like some recognition for them, let me know.

Enjoy

Friday, 18 January 2008

Thoughts on gearboxes etc

Its been a funny week, this week.
My parents have been over from 'Europe' (they live on a Dutch Barge - of no fixed abode) so I have been entertaining and talking boats/engines etc.

Mini and Vix - you'll be glad to know that this entry is not about rushing in with hammer and spanner, but thinking about engineering solutions for the future.

Long discussions took place about how to connect the engine to a gearbox/prop.

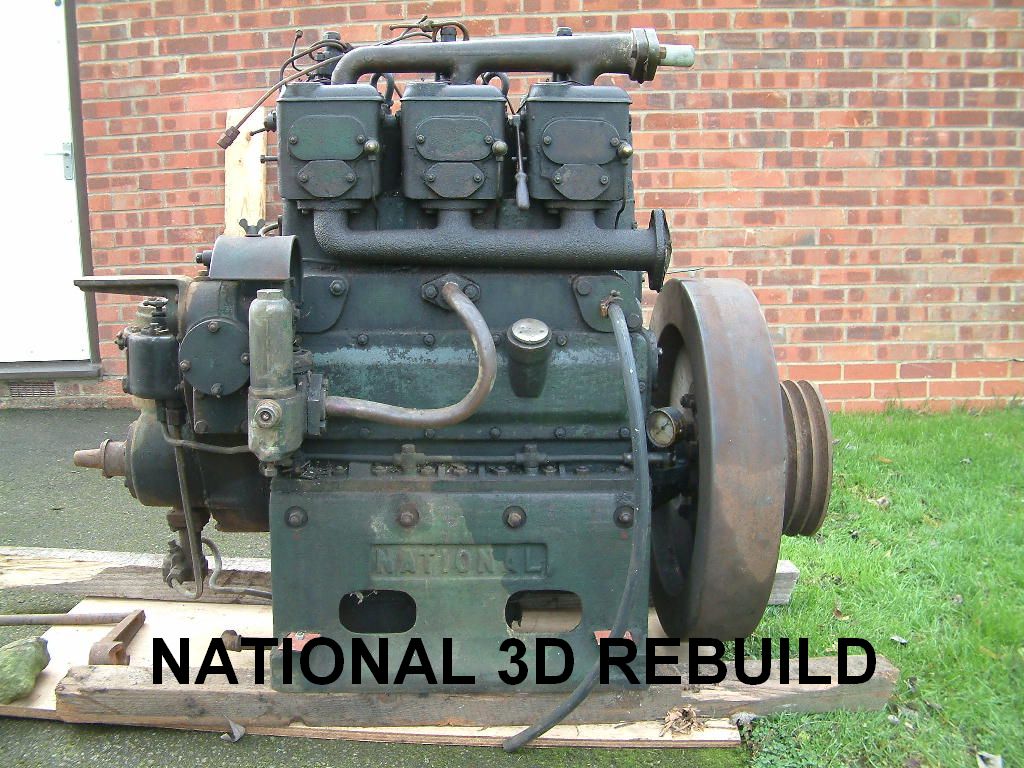
It sounds simple enough, but, as the 3D is an industrial engine the non flywheel end of the engine had the hand start dog fitted to it. A large triple vee belt pulley was bolted to the flywheel which was the power end of the engine.

Obviously, a genuine marine engine (see Warriors 3DM) had a different configuration at the non flywheel end of the crankshaft to allow the coupling of a gear box. So what to do?

The first decision has to be which way round to face the engine. The most common configuration for 'traditional' marine engines is to have the flywheel at the bow end and the gearbox connected to the non flywheel end. That said, as the years progressed and the basic engine block for both marine/automotive and stationary use became common, the flywheel often found its way to the gearbox end of the engine (often found on Gardners). In modern engines this is almost now the standard configuration.

Many marinised 'stationary' vintage engines have the gearbox at the flywheel end as this is usually the easiest engineering solution. It also protects the engine should the prop suddenly strike an object and stop suddenly. Something has to 'give' to absorb the stored energy in the flywheel. Better a bent prop blade/stripped gear/bent shaft rather than snapping the crank in your prized vintage engine!

The other decision has to be gearbox/prop shaft arrangements.
  1. A close coupled prm type gearbox
  2. A remote gearbox with double propshafts (as fitted to NB 'Hadar').
  3. Pure hydraulic drive system (hyd' pump bolted to the engine - hyd' motor down by the stern gland)


Above are NB Hadar's 'remote gearbox, using two shorter shafts reduces shaft torque 'wind up' and vibration

I'm fairly sure that current DM2 RN's use a prm 150 gearbox (not sure of the reduction ratio). I contacted prm and they advised that a prm 260 should be used due to the additional power/torque of the 3 cylinder engine.

If I use a prm 260 it would be a 2:1 reduction ratio. That would mean prop speeds of 125 to 500 rpm, which in turn will need a large diameter/pitch prop. If I went up to a prm 500, I could get it in 1.5:1 reduction. This would mean prop speeds of 167 to 667 rpm, thereby needing a smaller diameter/pitch prop.

A prm 260 is £1,200, a prm 500 is £1,800. Cheaper gearbox - bigger prop/shaft etc. More expensive gearbox - smaller prop etc.

I've emailed Crowthers with my dilemma, to see what they can advise regarding ratios, props, shafts and stern gear. No response yet, I'll give it a week and then follow it up with a phone call.

Why am I worrying about this now you may ask? Well, I have a plan that may see a close coupled gearbox on the non-flywheel end of the engine (trad' configuration), but it will need the non flywheel end of the crankshaft machining and an output flange fitting. If I adopt this plan, the work needs to be done when the crank is sent away for its regrind.

Of course - If one uses the pure hydraulic drive system all of the above is solved. Basic systems start from around £2,500 though. I'm not sure about the efficiency of the hydraulic drive system as well.

I am now going to sit back and await detailed comments from you blogger's with regard to the best solution........ Please?