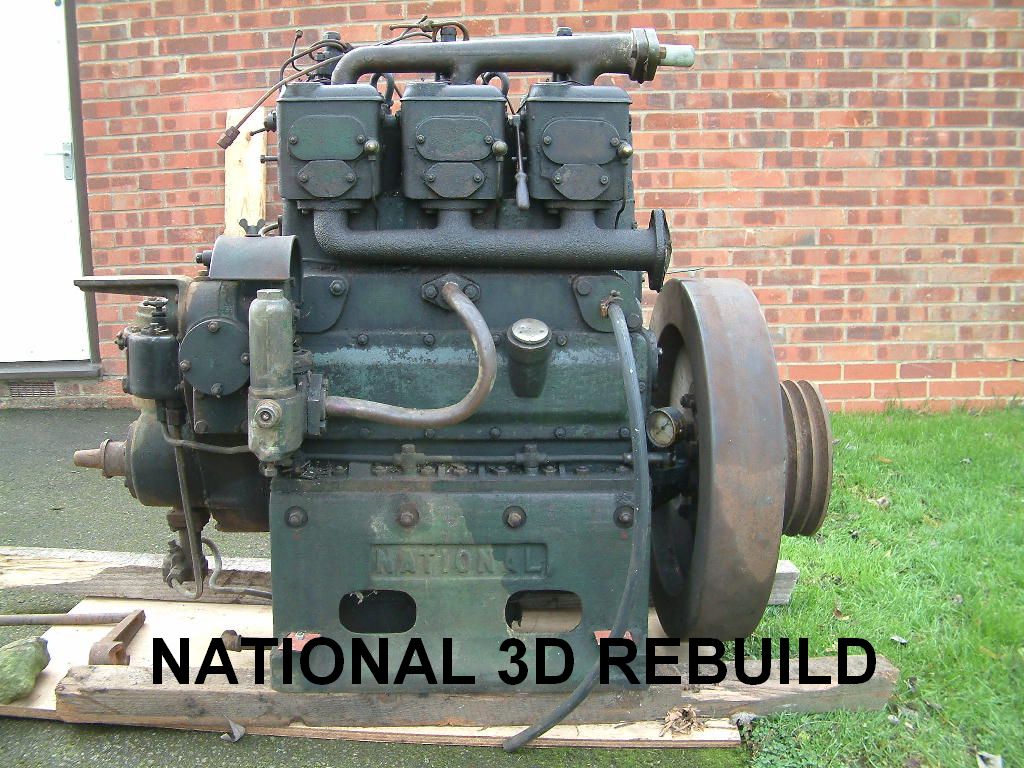
Sunday, 27 April 2008

Engine Bed

I've stopped procrastinating and made a decision.

I’m going to mount the engine: flywheel at the forward end and the gearbox at the rear. If I took the propshaft of off the flywheel end, I had a 4" stub of crankshaft at the non-flywheel end to mount any drive pulleys for alternator(s), water pumps etc. Where as the flywheel has numerous holes to through mount an extension shaft to run anything.

Flange of off the 4" stub, flexible coupling, then into the gearbox. The gearbox mounted in its own frame just behind the engine and all bolted to the same engine bed.

I’ve also decided to wait for the new PRM 260 with a 1:1 ratio as well. Its currently being tested (still no timeframes for ‘launch to the market’) but it will be ideal for my requirements. 21" standard prop and 1 ½" shaft/stern gear.

Now that the decision is made, my thoughts turned to an engine bed.


My plan is to set up whole engine up on an engine bed as part of the rebuild process. Everything would then be bolted down and aligned etc before the whole thing was supplied to the boat builder. All that would then be required would be to weld the engine bed to the base plate.

The engine is sitting on a 2 tonne trolley during the rebuild and it has an excellent flat surface. I wanted to make a template so that I could confirm all of the dimensions, hole centres and crank alignment dimensions.


First thing was to get every thing of off the trolley and give it a good clean. Next I stuck sheets of A3 paper all over it and then carefully placed the engine back on it. It was then a case of marking around the engine feet and the mounting holes.

The next thing was marking the ends of the crankshaft to get the centreline. I did this by carefully ‘plumb-lining’ from the ends of the crank.


Lift everything off, and hey presto, one engine bed template.


Knowing the gearbox dimensions and allowing some space for the coupling in between, I have estimated the engine bed to be approximately 5’ long. In practice it may be a bit shorter, but its easy to cut a bit off!

The engine bed will now be constructed out of 3 x 6 ‘C’ section (75mm x 150mm in new money). A quick call to my local steel stockist confirmed 13’ of channel would be a shade over £100.

Monday, 14 April 2008

Covers etc

Although I haven't been blogging much of late, things have been happening (apart from liner measuring)

I thought that I had better show a little bit more of the progress.
The next string of shots are really before and after shots. Before being, various components wire brushes and cleaned ready for painting. The after being similar shots of the same components with paint on them.

First up is the 'Airbox'. This sits on the side of the block and is the common air filter box for all three cylinders. The individual intakes for each cylinder draw air out of one of the three elongated slots. The multiple slots face downward toward the bottom of the engine. The Airbox is another component which I found the engine number stamped on it. Each of the outlets were also stamped 1, 2 & 3 respectively as well. The two studs sticking out of the side of the box are for mounting the fuel filter on.


The frame below is located inside the Airbox and (allegedly) holds the wad of horse hair together.
I think I'll cheat and use moderns synthetic filter material.

Next up is a few cover plates. Top left in the photo is the crank end cover for the non flywheel end. Top right is an inspection plate for the governor casing. The bottom two are blanking plates for cylinders 1 & 3, waterside of the block.


Next up are a series of pictures showing the cylinder block inspection doors. Obviously one door on either side of the engine. One having the oil filler point.


At some point in time I'm going to have to make joints for all of these various covers. Break out the Klingerite and wad punches!

Saturday, 12 April 2008

The Liner Wars (and Pistons)

Not so much a war - but I had to make a decision about the liners for the re-build.

NB Warrior kindly donated their old liners and pistons to see if they were better than mine. Now it was time to see which ones where the best.

There is no real alternative but to use good old fashioned measuring. And the measuring device – an internal micrometer of course.

Along came the evening when I had the house to myself. The liners duly found themselves on the kitchen table (hence the house to myself) all in a nice neat row.


Now I know, there’s only 5. The left hand three being mine the right hand two being ex’ Warrior (one never made it http://nbwarrior.blogspot.com/2008/03/even-goldfish-can-count-to-three.html)

The first measurement was the very top and very bottom of a liner. This confirms the original (non worn) diameter. Measurements are taken at 90 deg’ at each point to check to see how oval the bore is.

The reference measurements on my original liners was 4.125" (4.1/8th"). All three were spot-on.
Next was measuring the ‘worn area’. I was pleasantly surprised to find each liner gave the same readings of wear:
Longitudinally: 4.128 (3 thou wear). Transverse: 4.130 (5 thou wear) at the top of the stroke and slowly tapering out down to the original diameter as you went down the stroke. A max of 5 thou wear and 2 thou oval. Not a bad result.


Next up was the two (of three) liners from Warrior. The first difference was the original diameter. 4.135" top and bottom. They were both 10 thou oversize. The remaining measurements confirmed that the overall wear was of a similar pattern to mine but 1 thou less on each measurement.

The original factory spec was 4.1/8th" bore and 6" stroke. It would appear the Warriors liners, although slightly less worn than mine, have had a 10 thou re-bore in a previous part of their life.

Which ones to use – well, mine of course. I’ll have a chat with the machine shop, but I think a 5 thou hone from the original diameter to remove the oval bore and "the jobs a good un".

An examination of the pistons found them all to be of a similar condition. Mine have got the oil rings well and truly jammed in and are yet to be eased out. Both sets of pistons have slightly scuffed skirts, but nothing much to worry about. The ring groves are still tight and true. Overall, either set could be recycled with no problems.


All its going to take now is a trip over to Warrior to re-unite them with their 'bits'. Any excuse to see another National will do!

A useful exercise - and thanks to Jim & Sarah for the offer of their old liners and pistons.

Thursday, 27 March 2008

A view of things to come

Well the block is finally painted with its couple of initial coats of paint.

I need to check the amount of 'free' crankshaft at the non-flywheel end of the engine. This will either be used to drive alternators etc or be coupled to a gearbox (the jury is still out on this one).

The only way to be sure was to assemble the timing cases on the end of the engine and break out the ruler. It was a nice day to day so I wheeled the engine out in to the freash air and:

A view of things to come?

It was then a case of bolt on the timing case and then the governer/oil pump casing.


The result? 4 inches. It doesn't sound much, but as the Actress said to the Bishop, "4 inches can make all the difference!"

Mmmm...... what to do?

Wednesday, 26 March 2008

Loads of Pistons!

It’s been over 10 days since the last entry. Sorry.

It's not that I haven’t been doing anything either. I’ve been doing bits here and there, plus a bit of socialising. I can’t spend all my time in the garage being "Billy –no mates".

The main thing of note is ‘pistons and liners’.

I want to try to keep the engine as original as possible (I may have mentioned this before - yawn). Anyway – to cut a long story short, Jim and Sarah of NB Warrior fame very kindly offered me Warrior’s old pistons and liners if theirs were better than mine (they had all of theirs replaced with new shiny alloy ones when RN re-built their engine).

Plans were made and we decided to attend a CWF Banter at Napton (last Monday). Pistons would be compared and exchanged there. As it happen, I went to the boat gathering at Stoke Bruerne on the Sunday, so did Jim & Sarah, and the exchange took place in the Museum car park.

In the end I’ve kept all of the pistons and liners so that I can measure them and decide what are best. On the face of it, Warriors liners appear to be hardly worn at all and I think they could easily be recycled after a slight hone. The pistons also look better and again. I think these can be re-used.


A few other bits finished off now are the rocker covers and the cylinder head air intakes.


They where a real pain to clean up and paint, but they look nice now.

Hopefully I’ll hear back from PRM soon about the gearbox and coupling arrangements, I can then get the crank etc sent off for machining. It’s sat in the garage at the moment ready to go.


Still... plenty of other things to do in the mean time. I really do want to attack the cylinder heads soon!

Sunday, 16 March 2008

Inspiration

Half past three on a Friday afternoon and the mobile goes beep.
Its Keith and Jo on ‘NB Hadar’. "We’re at Thrupp, just up from the Jolly Boatman. We’ll be around for a couple of days if you want to meet."

Well, all of the household were out that night, so there was no time like the present. A few text’s later and we arranged to meet that night on the boat and then retire to the pub. It seemed like a good plan.

It ended up as a very pleasant evening in the company of Keith and Jo, plus fellow bloggers; Bones http://mortimerbones.blogspot.com/ and Maffi http://www.narrowboater.blogspot.com/.

Being as it was dark and all that, I returned the following morning to talk engines and stuff with Keith.
Keith and Jo are justifiably proud of Hadar. Built by Roger Fuller, she’s as good a replica (little) Northwich as you’ll ever see. At her heart beats a National DA 2.

The National DA is very different to the D engine, but is every bit as nice. Keith went through the normal priming procedures and, with a couple of seconds prod on the starter button, she fired up and settled down to a deep sounding rhythm. Very nice. Keith and Jo have had their own problems with their DA and these are well documented on their blog. That said, I don’t think they’d want anything else in the engine room.

The tittle of the post – ‘Inspiration’. A couple of hours with fellow Narrowboaters and vintage engine enthusiasts does help now and then. The sound of their DA makes you want to come back and get on with your own project.

Onwards and upwards!

Saturday, 8 March 2008

Engine Number(s)

Sarah (nb Warrior blog) recently posted about some recently acquired injectors http://nbwarrior.blogspot.com/2008/03/if-youre-going-to-mug-me.html

Amongs't the ramblings of an excited woman ;-) she bought up the subject of the number(s) stamped on them (check out the comments).

Well, my injectors are all stamped with:
5mm
NATIONAL
56214
No1

6mm
NATIONAL
56214
No2

4mm
NATIONAL
53514
No4

56214 is my engine number, so:

Two of the original injectors for No's 1 & 2 cylinders and a replacement for No 3 (of off engine number 53514?). So where is engine number 53514 (was it a 4 cylinder?), and who's got my injector for No 3 cylinder?


So, there I am - out in the garage doing guess what? - cleaning, wire brushing, painting!

This time its the rocker covers. And guess what - on the flat machine end of the cover is stamped 56214 -1. Before you can say "boo to a goose", the remaining 5 have the machined ends cleaned up. Each are stamped 56214 - 1, 56214 - 2 & 56214 - 3. Three for the inlet and three for the exhaust.

I don't think you can see it very well in the photos, but its on the 'flat bits' at the front of each one.
Why did National take the time to stamp up individual components with the engine number and sub numbers for each of the cylinders? Surely a rocker cover is a rocker cover? It wouldn't be individually machined and made to measure for each cylinder etc - or would it?.

The only other place I know that the engine number is stamped is on the block at the flywheel end

So - where else is it going to turn up?
Edited to add - Jim, put your spanners down. Don't let Sarah make you take it apart, "just to see". ;-)